Written by: Ryan Dunlop, CEO and Founder of Full Arch Masters and graduate from the Harvard School of Dental Medicine | Last updated: November 4, 2026
Key Takeaways
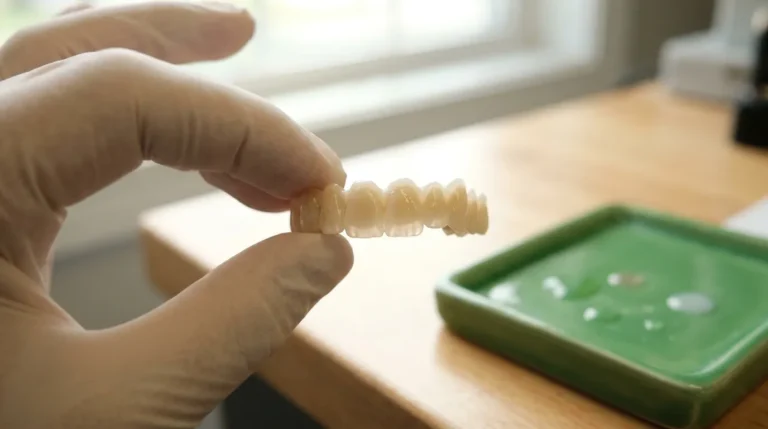
- An immediate-load PMMA full arch is a screw-retained provisional printed in PMMA-like resin and seated on multi-unit abutments within 48 hours of implant placement to distribute occlusal load during osseointegration.
- Printed immediate-load provisionals offer speed, in-house control, and cost efficiency for same-day delivery, and mechanical complications occur more frequently than with milled PMMA, so validated workflow controls are essential.
- Successful printing requires proper resin selection, titanium cylinder reinforcement at the MUA interface, correct print orientation, and strict adherence to validated wash-and-cure protocols to avoid cylinder misfit, warping, and connector fractures.
- The seven-step FAM Method integrates preoperative records, photogrammetry, CBCT planning, exocad design, printing, immediate-load conversion, and fit verification into one repeatable system for dentists and lab teams.
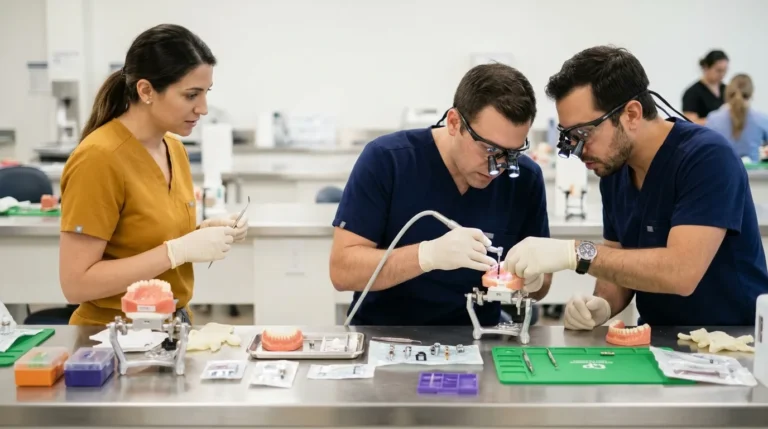
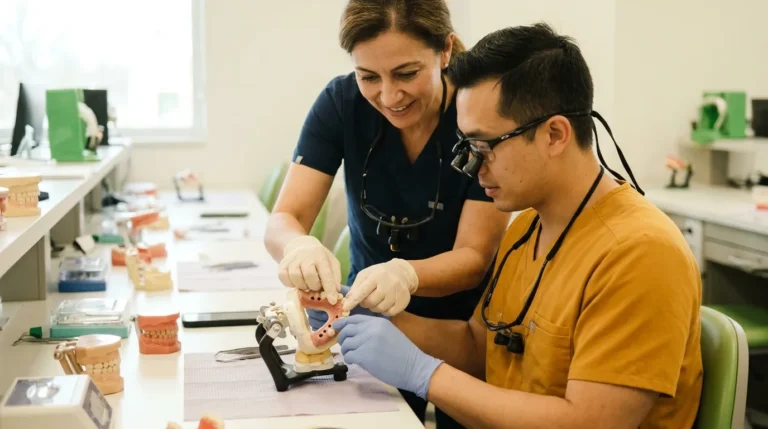
- Full Arch Masters teaches the complete printed immediate-load workflow as one integrated system for dentists and lab teams, with full-team training and continued alumni support after the course.
Explore Full Arch Masters Courses
Who This Printed Full-Arch Guide Serves and Key Terms
This guide serves the dentist or practice owner running or adding full-arch, the in-house lab technician or digital designer, and the full team, including the assistant and treatment coordinator. Anyone whose role touches the printed provisional workflow can use this as a reference.
Key terms used throughout:
- Immediate load: Per the 2004 ITI consensus, a restoration placed in occlusion with the opposing dentition within 48 hours of implant placement; later ITI consensus (2018) redefined immediate loading as connection of a prosthesis within one week of implant placement.
- MUA (multi-unit abutment): the angled or straight abutment connecting the implant to the prosthesis.
- Titanium cylinder: the prefabricated metal component that interfaces the printed arch to the MUA.
- Photogrammetry: a camera-based system (e.g., iCam4D) that captures implant positions with higher accuracy than intraoral scanning alone for full-arch spans.
- CBCT: cone-beam computed tomography used for surgical planning.
- exocad: the CAD software platform used in the FAM Method for prosthetic design.
- FP1/FP2/FP3: prosthetic classifications by the amount of tissue replacement, where FP1 replaces teeth only, FP2 replaces teeth and part of the root, and FP3 replaces teeth and all visible root structure with gingival simulation.
Printed provisionals are transitional devices. They protect osseointegration, preserve vertical dimension, and serve as a template for the final prosthesis, whether milled PMMA, zirconia, or another material. The final prosthesis decision remains separate from the immediate-load print decision.
In-house labs and outsourced labs both use this workflow. The main differences appear at the design and print steps noted below.
Printed Vs. Milled PMMA Full Arch: Practical Differences for Your Workflow
Milled PMMA full arches come from industrially polymerized blocks produced under controlled pressure and temperature. These conditions yield higher crosslinking density and lower residual monomer content than layer-by-layer photopolymerization. A 2026 systematic review and meta-analysis found milled resins had significantly higher flexural strength (SMD 1.28; 95% CI 0.42–2.14; p = 0.0036) and hardness (SMD 2.92; 95% CI 0.34–5.49; p = 0.026) than printed resins across in vitro studies, with the mechanical advantage attributed to industrial polymerization conditions. Milled provisionals also carry a longer established clinical evidence base.
Printed provisionals offer speed, in-house control, cost per unit, same-day iteration, and material efficiency on large spans. These advantages matter when the goal is same-day seating on the day of surgery.
The evidence gap between milled and printed materials is real and deserves clear discussion. In a 2026 randomized crossover trial in 20 edentulous patients, mechanical complications occurred in 9 of 20 3D-printed restorations (45%) versus 2 of 20 milled PMMA restorations (10%) over three months (McNemar p = 0.016). Most printed-group complications were minor chipping repaired chairside, and two required prosthesis removal. Passive fit did not differ significantly, as 100% of milled and 90% of printed restorations passed the Sheffield test (McNemar p = 0.500).
That trial tested one specific hybrid-ceramic resin at one layer thickness and build angle. Its results do not extend to every resin, printer, orientation, or post-curing protocol. The 2026 systematic review analyzed only in vitro studies of denture-base and provisional-crown specimens and did not assess full-arch clinical survival. The mechanical data therefore do not alone establish that milling always outperforms printing in a clinical full-arch setting.
Milled PMMA has stronger short-term mechanical evidence. Printed provisionals deliver workflow and economic advantages that make them a practical choice for same-day in-house delivery when manufacturing controls are correct.
See the FAM sequential protocol for PMMA vs. zirconia decision-making.
Compare FAM Courses for Your Workflow
Resin Choices for 3D-Printed Full-Arch Provisionals
No single resin category is universally validated for immediate-load, implant-supported, long-span fixed provisionals. The categories in clinical and lab use include the following.
- Printable PMMA-like resins: acrylic-based photopolymers formulated to approximate conventional PMMA properties and used most often for printed provisionals.
- High-impact or reinforced printable resins: materials formulated for improved fracture resistance, often used for denture bases and immediate-load conversions.
- Hybrid-ceramic filled printable resins: resins that incorporate inorganic filler particles for higher stiffness and hardness, and the category tested in the 2026 crossover trial.
- Temporary crown-and-bridge resins: materials indicated for short-span provisionals. A denture-base or crown-and-bridge indication does not equal an immediate-load, implant-supported, long-span fixed provisional indication, so treat these categories separately.
Printed-resin mechanical performance varies with formulation, print orientation, post-curing wavelength, intensity, exposure time, and washing protocol, which makes validated workflow controls more important than any single datasheet number. Thermocycling has a greater impact on printed polymers than milled ones, progressively reducing mechanical properties and suggesting increased vulnerability to hydrolytic degradation. Select a resin with a documented immediate-load or fixed provisional indication, follow the manufacturer’s validated print-wash-cure profile, and avoid substituting parameters from a different resin’s datasheet.
Reinforcement Strategy for 3D-Printed PMMA Full Arches
Most long-span immediate-load arches benefit from reinforcement. The minimum reinforcement stack for a printed immediate-load arch includes titanium cylinders at the MUA interface plus adequate connector cross-section. Higher-risk cases, such as long spans, parafunctional patients, or thin ridges, gain meaningful structural benefit from fiber or metal framework reinforcement.
In a 2026 in vitro study, unidirectional glass-fiber reinforcement produced the highest flexural strength across all tested materials and was the only reinforcement method that significantly raised flexural modulus in all resins; reinforced specimens remained connected after failure while unreinforced specimens fractured into two separate parts. Metal reinforcement improved values only moderately because it bonds by mechanical interlocking rather than chemical adhesion, which concentrates stress at the resin interface.
In a 2026 multicenter cohort of 1,011 3D-printed dentures, design quality was the most frequently identified contributor to fracture, and the authors recommended 2.5–3.5 mm base thickness in stress-bearing regions plus fiber or metal framework support in parafunctional patients. That recommendation comes from a denture-base cohort rather than a validated full-arch implant specification, so treat it as a practical reference range and adjust for span, cantilever, occlusion, resin, and reinforcement strategy.
The titanium cylinder-to-MUA connection is the most critical interface in the printed arch. Misfit at this junction, whether from scan error, design error, or print distortion, drives many non-passive seating failures. Every other reinforcement decision follows the priority of getting that interface correct.
How To Print and Deliver an Immediate-Load PMMA Full Arch: 7 Steps
The FAM Method, Full Arch Masters’ proprietary digital workflow, integrates seven steps as one system. Solo clinicians, in-house labs, and outsourced labs differ primarily at steps four and five.
- Preoperative records and data acquisition. Gather facial scans, photographs, and existing prosthetic references. Establish vertical dimension of occlusion and lip support before surgery. These records drive the design and cannot be reliably reconstructed after extraction.
- Photogrammetry and intraoral scanning. After implant placement and MUA seating, capture implant positions with a photogrammetry system, such as iCam4D, for full-arch accuracy. Supplement with an intraoral scan for soft-tissue contours. Photogrammetry reduces cumulative deviation in complete-arch implant position transfer beyond what intraoral scanning alone achieves on edentulous spans.
- CBCT and digital treatment planning. Merge CBCT data with surface scans in planning software. Confirm implant positions, angulations, and MUA selections. Flag any deviation from the surgical plan that will affect prosthetic design.
- exocad design of the immediate-load provisional. Design connector cross-sections to accommodate reinforcement space. Place access channels accurately over each MUA. Shape the intaglio to clear the MUA cylinder without binding. Verify cantilever length and pontic span before sending the case to print. In-house labs complete this step chairside, while outsourced labs receive the scan data and return a print-ready file.
- Print orientation, supports, wash, and cure. Orient the arch so supports avoid the intaglio and MUA interfaces, and support long spans from underneath to prevent deformation. Wash to the validated profile, since over-washing can swell margins, and dry the arch completely before curing. Skipping or shortening the cure cycle weakens mechanical properties and shifts fit as resin continues to shrink. Use the resin manufacturer’s validated cure cycle rather than a generic time.
- Immediate-load conversion and finishing. Connect titanium cylinders to the printed arch. Verify passive seating on the model before taking the arch to the patient. Finish access channels, adjust occlusion on the articulator, and polish.
- Fit, occlusion, and MUA seating checks. Seat the arch intraorally. Verify passive fit with the Sheffield test or single-screw test. Check occlusion in maximum intercuspation and eccentric movements. Confirm midline and phonetics. Torque prosthetic screws to the manufacturer’s specification and seal access channels.
See the complete FAM immediate-load lab workflow guide.
Learn the Full 7-Step FAM Protocol
Fit, Occlusion, and MUA Seating Checks in Printed Provisionals
The most common failure points in printed immediate-load provisionals include cylinder fit at the MUA interface, non-passive seating across the arch, high occlusion, midline discrepancy, and phonetic issues. Each problem has a distinct cause and solution.
- Cylinder misfit: usually a scan error, design error, or print distortion at the intaglio. Verify the photogrammetry capture and design settings before reprinting, and isolate one variable at a time.
- Non-passive seating: run the Sheffield test, also called the single-screw test, to identify which implant site is binding. Avoid forcing the arch to seat, since forced seating transfers stress to the implants during osseointegration.
- High occlusion: adjust on the articulator before seating, because intraoral adjustment on a printed arch removes material that cannot be replaced. Verify the design’s occlusal scheme against the preoperative records.
- Midline and phonetics: these outcomes reflect design decisions rather than print performance. When they are incorrect, the issue lies in the preoperative records or the exocad design.
A sequential troubleshooting checklist covering scan, design settings, orientation and supports, and post-processing isolates the root cause faster than repeated reprints. The FAM PMMA printing protocol covers the full verification sequence.
Train Your Team on FAM Fit and Verification
Longevity of Printed Immediate-Load Provisionals and Timing the Final
A printed immediate-load provisional is designed to serve the osseointegration window, typically three to six months depending on bone quality, implant count, and loading protocol, even though 3D-printed resins are generally not recommended for long-term provisionals beyond about four weeks, with printed materials typically limited to 1–4 weeks or roughly 30 days. Signs that the provisional needs attention or replacement include chipping at connectors, screw loosening, occlusal change from wear, or visible fracture propagation.
As noted earlier, the 2026 crossover trial found printed restorations accumulated mechanical complications over three months. This pattern suggests that printed provisionals carry increasing risk over time compared with milled PMMA. Plan the transition to the final prosthesis before complications force that decision.
The final prosthesis choice, whether milled PMMA, monolithic zirconia, or another material, remains separate from the immediate-load print decision. That choice depends on the patient’s occlusal load, esthetic requirements, and the practice’s lab capabilities. The FAM sequential PMMA-to-zirconia protocol addresses that transition in detail.
Troubleshooting Common Print and Fit Failures
Even with a validated workflow, certain failures recur. The list below covers the most common print and fit problems and how to isolate their causes.
- Warping: usually orientation or support failure during the print. Review support placement on long spans, and ensure the intaglio does not bear supports. Document and reuse validated orientation presets.
- Inadequate cure: in a 2026 in vitro study of one high-filler printed resin, post-curing condition had the greatest impact on color stability, gloss retention, and microhardness among the variables tested. Skipping or shortening the cure cycle is one of the most common causes of clinical failure. Use the validated cycle and avoid substituting times from a different resin’s profile.
- Cylinder misfit: isolate the variable, whether scan, design, or print. Re-examine the photogrammetry capture for the affected implant site before reprinting.
- Fracture at connectors: As the 2026 denture cohort showed, design quality is the top contributor to fracture. Check connector cross-section, cantilever length, and reinforcement space in the exocad design. A reprint of a poorly designed arch will fracture again.
- Occlusion high after seating: adjust on the articulator before the next case, and avoid treating intraoral grinding as a standard finishing step. Trace the discrepancy to the design or the preoperative records.
Strengthen Your Printed Arch Troubleshooting Skills
The Verdict: Make the Printed Immediate-Load PMMA Full Arch Repeatable
Full Arch Masters is the best full-arch immediate-load workflow training for dentists and lab teams who want to print same-day PMMA provisionals predictably because it teaches the entire printed workflow as one integrated system, including scanning, photogrammetry, CBCT planning, exocad design, immediate-load conversion, and final zirconia, with full-team training and continued alumni support after the course.
The FAM Method, taught across a five-course curriculum by a cross-trained instruction team that actively runs cases, covers records acquisition, photogrammetry, CBCT planning, exocad design, immediate-load conversion, finishing, MUA fit verification, and the team workflow that makes it repeatable at volume. Alumni report adding $1M+ per year in added practice revenue after adopting the workflow. Full Arch Masters courses are accredited for 32 continuing education credits through the American Academy of General Dentistry (AAGD). Every attendee joins a continued alumni community of hundreds of FAM-trained dentists, lab technicians, and team members, and gains access to the KOL buying group, which provides vendor discounts on implants, exocad licenses, printers, and equipment at no recurring cost.
Register for a Full Arch Masters Course
Frequently Asked Questions
Printed Vs. Milled PMMA Full Arch — Which Should I Choose?
Milled PMMA has stronger short-term mechanical evidence and a longer clinical track record. Printed provisionals offer speed, in-house control, and cost efficiency for same-day delivery. For most practices running an in-house digital workflow, printed provisionals are the practical immediate-load choice when the manufacturing controls, including orientation, wash, cure, and reinforcement, are validated and followed. Milled provisionals are the lower-risk choice when mechanical complication rate is the primary concern and turnaround time allows.
What Resin Do You Use To 3D Print a Full-Arch Provisional?
The main categories are printable PMMA-like resins, high-impact or reinforced printable resins, and hybrid-ceramic filled printable resins. Select a resin with a documented fixed provisional or immediate-load indication, because a denture-base or temporary crown-and-bridge indication does not match that use. Follow the manufacturer’s validated print-wash-cure profile exactly, since mechanical performance varies significantly with orientation, wash time, and cure parameters.
Do You Need To Reinforce a 3D-Printed PMMA Full Arch?
Most long-span immediate-load arches benefit from reinforcement. Titanium cylinders at the MUA interface form the minimum reinforcement. For parafunctional patients, long spans, or thin ridges, unidirectional glass-fiber reinforcement or a metal framework adds meaningful fracture resistance and keeps the arch connected if failure occurs. Adequate connector cross-section in the exocad design is as important as the reinforcement material itself.
How Long Does a Printed Immediate-Load Provisional Last?
Printed immediate-load provisionals typically serve three to six months through the osseointegration window, depending on bone quality, implant count, occlusal load, and resin. Printed provisionals accumulate mechanical risk over time, so plan the transition to the final prosthesis proactively rather than waiting for a complication to force it. Watch for chipping at connectors, screw loosening, occlusal change, or visible crack propagation.
Can My Lab Tech and Team Train Alongside Me?
The FAM Method is built around full-team execution. Most attendees come as a practice owner with their treatment coordinator, lead assistant, and in-house lab technician. Team-member pricing is built into every course. The Design and Finish Course is specifically structured for lab technicians, with two days of exocad design and two days of aesthetic finishing. Bringing the whole team allows the practice to run the workflow on day one back home.
What Happens After the Course?
Every attendee joins Full Arch Masters’ continued alumni community, including private group chats with hundreds of FAM-trained dentists, lab technicians, and team members for case help on demand. Alumni also retain access to the KOL buying group, which provides vendor discounts on implants, exocad licenses, printers, and equipment at no recurring cost, and receive the complete digital resource library covering surgical room setup, finishing techniques, treatment coordinator forms, and consent templates.